MySQLのインストールとrootユーザーのパスワード設定
カテゴリ:データベース編
リレーショナルデータベースとは
リレーショナルデータベース(RDBMS)は関係データベースとも呼ばれ、関係するデータ群が列と行に格納されたテーブル単位でまとめられて管理される構造のデータベースです。テーブルやデータを操作するためには、問い合わせ言語であるSQL言語を使用し、テーブルやデータ同士を関係づけて結果を出力することが可能です。
主なオープン系データベースの種類と特徴
主なオープン系データベースの種類と特徴をざっくりと表すと以下のようになります。
| 種類 | 特徴 |
|---|---|
| MySQL | PostgreSQLよりも実行速度が速く、メモリ消費量も少ない 更新型データベースであり、VACUUM処理は不要 |
| PostgreSQL | MySQLよりも高機能で堅牢性が高く、業務環境など大規模環境や高負荷環境向き 追記型データベースであり、一度データを保存した領域は定期的にVACUUMという処理を行い再利用する |
| MariaDB | MariaDBはMySQLから派生(フォーク)したデータベースで、MySQLがOracle傘下となったことを危惧して、多くのLinuxディストリビューション(Red Hat Enterprise Linux 7以降、Debian 9以降等)が標準データベースとして切り替えている MySQL互換(MySQL5.xまで) |
MySQLとは
MySQLはPostgreSQLと双璧をなすフリー且つオープンソースのリレーショナルデータベースです。現在、殆どのレンタルサーバーで利用可能です。 また、WordPressを始め、標準的なWeb環境の構成ソフトウェアであるLAMP(Linux、Apache、MySQL、PHPの略)にも含まれています。Web開発においてMySQLの知識は必須であり、またMySQLを知っていれば殆どのWebシステムのデータベースに対応できるでしょう。
そのため、Webサイトを作成するためのデータベースとして、まずMySQLから入るのが無難で効率的です。本サイトではデータベースとしてMySQLを基本として解説していきます。
MySQLのインストール
開発環境でMySQLを利用できるように、MySQLをインストールしましょう。
Windows環境の場合
Windows環境の場合、XAMPPを利用している環境であれば既にインストールされているため、XAMPPのコントロールパネルからMySQLを起動するだけです。
Windows Subsystem for Linux (Ubuntu) で Apache を動かしている場合は、コマンドプロンプトで bash に切り替え、以下のコマンドで MySQL をインストールします。
Note例では省略していますが、管理者ユーザー以外の場合はコマンドの先頭にsudoを付与する必要があります。
apt update
apt install -y mysql-server
Mac環境の場合
Macの場合は、インストール方法はいつくかありますが、一般的にはターミナルから Homebrew でインストールします。
brew update
brew install mysql
バージョンの確認
以下のコマンドでMySQLのバージョンを確認できます。
mysql --version例)
# mysql --version
mysql  Ver 14.14 Distrib 5.7.29, for Linux (x86_64) using  EditLine wrapper
rootユーザーパスワードの設定
以下のコマンドを実行してMySQLのrootユーザーのパスワードおよびセキュリティ設定を行います。
mysql_secure_installation実行例)
$ sudo mysql_secure_installation

Securing the MySQL server deployment.

Connecting to MySQL using a blank password.
The 'validate_password' plugin is installed on the server.
The subsequent steps will run with the existing configuration
of the plugin.
Please set the password for root here.

New password:

Re-enter new password:

Estimated strength of the password: 25
Do you wish to continue with the password provided?(Press y|Y for Yes, any other key for No) : y
By default, a MySQL installation has an anonymous user,
allowing anyone to log into MySQL without having to have
a user account created for them. This is intended only for
testing, and to make the installation go a bit smoother.
You should remove them before moving into a production
environment.

Remove anonymous users? (Press y|Y for Yes, any other key for No) : y
Success.


Normally, root should only be allowed to connect from
'localhost'. This ensures that someone cannot guess at
the root password from the network.

Disallow root login remotely? (Press y|Y for Yes, any other key for No) : n

 ... skipping.
By default, MySQL comes with a database named 'test' that
anyone can access. This is also intended only for testing,
and should be removed before moving into a production
environment.


Remove test database and access to it? (Press y|Y for Yes, any other key for No) : y
 - Dropping test database...
Success.

 - Removing privileges on test database...
Success.

Reloading the privilege tables will ensure that all changes
made so far will take effect immediately.

Reload privilege tables now? (Press y|Y for Yes, any other key for No) : y
Success.

All done!Note「Your password does not satisfy the current policy requirements」と怒られた場合はパスワードの強度が低いことを示しているため、大文字小文字、英字と数字の組み合わせなど強力なパスワードに変更して再度試してください。
パスワードチェックを無効にする場合は、vi で /etc/mysql/mysql.conf.d/mysqld.cnf を開き、[mysqld] セクションに validate-password=OFF を設定し、MySQLを再起動(service mysql restart)します。
MySQLに接続します。
mysql以下のように mysql> のプロンプトが表示されるはずです。
$ sudo mysql
Welcome to the MySQL monitor.  Commands end with ; or \g.
Your MySQL connection id is 23
Server version: 5.7.29-0ubuntu0.18.04.1 (Ubuntu)

Copyright (c) 2000, 2020, Oracle and/or its affiliates. All rights reserved.

Oracle is a registered trademark of Oracle Corporation and/or its
affiliates. Other names may be trademarks of their respective
owners.

Type 'help;' or '\h' for help. Type '\c' to clear the current input statement.

mysql> 参考何故、パスワード無しで接続できたのでしょうか?それはUbuntuのMySQL 5.7以降のバージョンでは認証プラグインがパスワード無し認証の auth_socket であるためです。但しこのままではPHPなどからパスワード認証が行えないため、後述するパスワード変更手順で、mysql_native_password に変更します。
注意もしここで Access denied となる場合、代わりに mysql -u root -p を実行し、パスワードが求められたらパスワードを入力してください。ログインできた場合、認証プラグインは既に mysql_native_password であるため以降のrootユーザーのパスワード変更の手順は不要です。
rootユーザーのパスワードを変更します。
ALTER USER 'root'@'localhost' IDENTIFIED WITH mysql_native_password BY '新しいパスワード';許可テーブルをリロードします。
FLUSH PRIVILEGES;実行例)
mysql> ALTER USER 'root'@'localhost' IDENTIFIED WITH mysql_native_password BY 'password';
Query OK, 0 rows affected (0.01 sec)

mysql> FLUSH PRIVILEGES;
Query OK, 0 rows affected (0.01 sec)データベースから切断する場合は、\q を入力します。
\q以降、MySQLに接続する場合は、以下のコマンドを実行し、設定したパスワードを入力します。
mysql -u root -p実行例)
$ sudo mysql -u root -p
Enter password:
Welcome to the MySQL monitor.  Commands end with ; or \g.
Your MySQL connection id is 31
Server version: 5.7.29-0ubuntu0.18.04.1 (Ubuntu)

Copyright (c) 2000, 2020, Oracle and/or its affiliates. All rights reserved.

Oracle is a registered trademark of Oracle Corporation and/or its
affiliates. Other names may be trademarks of their respective
owners.

Type 'help;' or '\h' for help. Type '\c' to clear the current input statement.

mysql>
文字コード設定
初期設定の文字コードをUTF-8に変更しておきます。
vi で /etc/mysql/mysql.conf.d/mysqld.cnf を開き、[mysqld] セクションの最後に以下を追加します。
character-set-server=utf8
ファイルを保存後、MySQLを再起動します。
service mysql restartphpMyAdminのインストール
殆どのレンタルサーバーではMySQLをWeb上から管理できるツールであるphpMyAdminが提供されています。 MySQLの殆どの操作は実際にはこのphpMyAdmin上で実行することになるため、テスト環境にも導入しておきましょう。
Note但しデータベースの理解という観点では、MySQLの一通りの操作はコマンドベースで実行できるスキルを身に付けておくことをお勧めいたします。
インストールは以下のコマンドで、phpMyAdminをインストールします。(Apacheは既にインストールされている前提)
apt install phpmyadminNote依存パッケージの追加インストールが求められたら y で許可しましょう。またphpMyAdminのパスワードが求められる場合もあるため画面の指示に従いましょう。
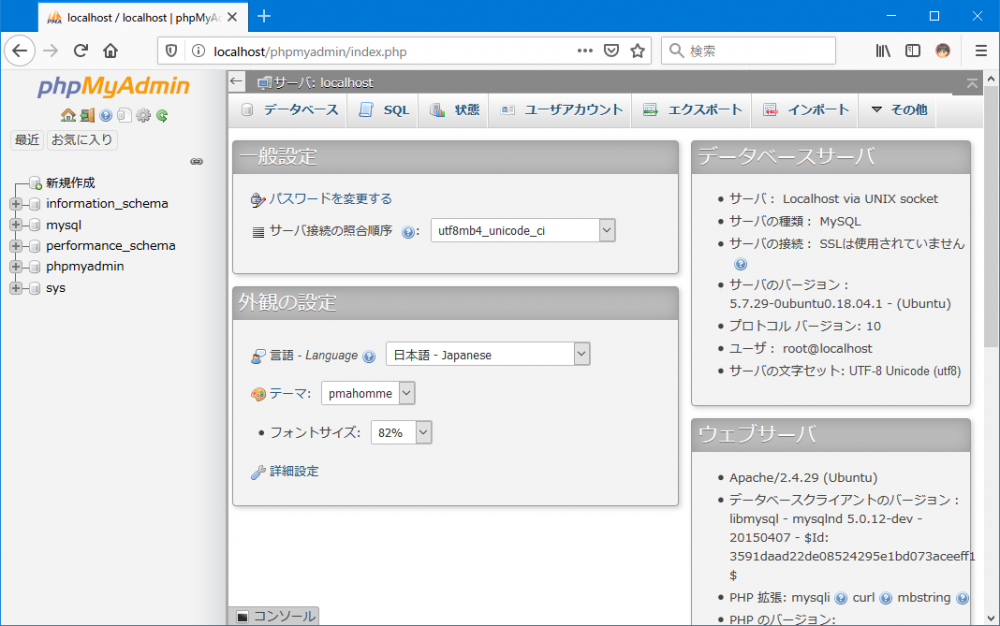
インストールが完了したら、Webブラウザから http://localhost/phpmyadmin/ にアクセスし、rootユーザーとパスワードでログインできることを確認しましょう。(ログイン画面が表示されない場合は、Apacheを再起動してみてください。)
MySQLのインストールとrootユーザーのパスワード設定が完了すれば、次の記事より基本的なSQL構文の解説に移ります。
公開日時:2020年04月25日 10:11:37